
The Best Cricut Materials For Making Labels & How To Use Them
Here’s how to use your Cricut machine to make home organization labels and which materials to use based on the type of containers you have. Written in partnership with Cricut.
When you scroll through gorgeous photos of organized spaces with fancy labels on all the containers, those are likely made using a Cricut machine. There are so many different types of labels a Cricut machine can make and a huge variety of materials to choose from, which can be a little overwhelming.
This guide will help you narrow down which material is right for your organizing project and how to master making professional-looking labels for your home. We’ll focus on the top five Cricut materials pro organizers use so you can skip decision fatigue and jump right into making labels to get your home Organized-ish.

1. Cricut Vinyl For Decal Labels
The classic Cricut vinyl is the most-used material for making labels. It’s easy to work with, affordable, and comes in a huge variety of colors. The look you get with vinyl decal labels is very high-end because there’s no background. The words are shown directly on the container and look like they were meant to be there.

Vinyl labels are best for:
- Making cheap containers look expensive
- Creating a high-end organization aesthetic
- Oversized or extra small labels
- Simple pictogram labels instead of words

Removable or Permanent?
Cricut vinyl is available in both removable and permanent options, but for labeling, I always recommend choosing the removable kind when you can. While you may not think you’ll ever need to take the label off the container, you never know when your storage needs might change. It’s better to stick with removable so you have that flexibility.

Premium or Smart Vinyl?
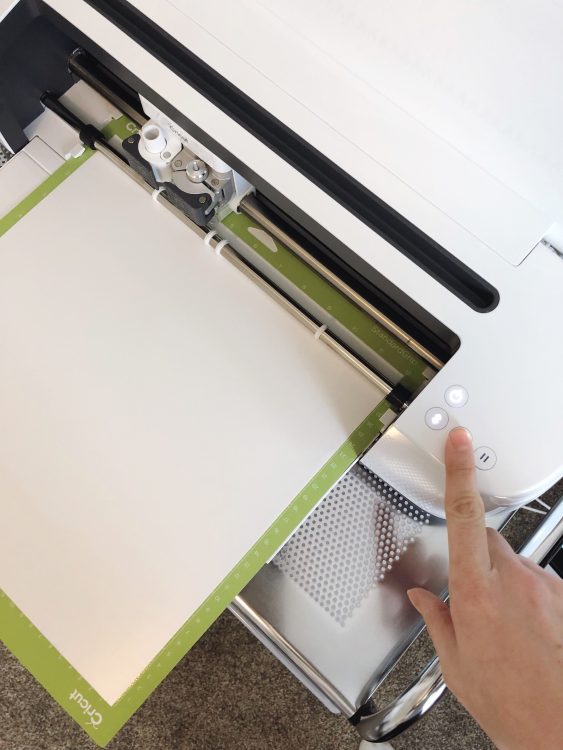
Cricut Premium Vinyl works with all Cricut cutting machines. It requires a Cricut cutting mat (either the green Standard or blue LightGrip) in order to be used. Cricut Smart Vinyl only works with Maker 3 and Explore 3, Joy, and Joy Xtra, but does not require a cutting mat. It has a thicker backing so you can slide the Smart Vinyl directly into the machine. (Note: Smart Vinyl comes in different sizes, so be sure it’s compatible with your specific machine)
Read More: The Best Cricut Fonts For Making Labels
2. Cricut Print Then Cut Sticker Labels
A ‘print then cut label’ is essentially a sticker. Your Cricut machine pairs with your home’s printer to create a complex or multi-color label on sticker paper, then the machine cuts it out so you can remove the adhesive backing and apply onto your surface. You don’t have to do any weeding and you don’t need transfer paper, which makes application much easier.

Printed labels are best for:
- Labeling notebooks, planners, & journals
- Multi-color image and text combos
- Kids’ room labeling & pictograms
- Fast and easy no-weeding projects

Printable vinyl or sticker paper?
Cricut offers a good mix of print then cut materials including both vinyl and paper varieties. You can choose waterproof printable vinyl for pantry food containers and drink bottles or regular printable vinyl for plastic and glass storage bins. Printable sticker paper is better for paper and cardboard items like notebooks and file folders. You can find this paper in both clear and white.

Inkjet or laser printer?
Cricut recommends using an inkjet printer instead of a laser printer for all print then cut projects. The reason is because a laser printer uses heat which can lessen the strength of adhesive-backed papers and vinyl. A laser printer is fine for paper-only print then cut projects, but stick with inkjet for anything with a sticky backing.
Read More: How To Make Stickers With Cricut
3. Cricut Smart Label Writable Vinyl
Cricut Smart Label Writable Vinyl gives you the best of both worlds when it comes to organization labels. You get the durability of vinyl and the cozy look of handwritten labels. This special type of extra thin vinyl allows your Cricut machine to write on it with a pen without smearing. Then the machine cuts out the label in whatever shape you choose in Design Space.
These are the fastest and easiest labels to make with a Cricut machine because they don’t require a printer, weeding tools, or transfer paper. The machine does all the work for you. Once the labels are complete, you just peel them off like a sticker and apply onto your surface.

Writable Vinyl Labels are best for:
- Quick organizing projects
- Making lots of labels at one time
- Acrylic and glass application
- Temporary labeling (the Removable option is very easy to take off if needed)

What Color & Size Options Are Available?
Cricut Smart Label Writable Vinyl is available in 13″ x 3′ rolls for Maker 3 and Explore 3 in white, black, or transparent color options. You can also find it in Cricut Joy-sized rolls and Joy Xtra-sized sheets in white only, or Cricut Joy sheets in black, white, transparent, gold, silver, and holographic. You can select removable or permanent for most color options.

Which Pens Are Compatible?
Cricut Smart Label Writable Vinyl is compatible with Cricut’s standard pens and markers, but it does not work with Cricut gel or metallic pens. You can also use Cricut pens to write on the labels by hand instead using the machine. This is really helpful for making a bunch of blank labels at once to keep on hand for future containers.
Read More: How To Make Labels With Writable Vinyl
4. Cricut Smart Label Paper
Cricut Smart Label Paper is very similar to the Writable Vinyl, but it’s in paper form instead. It has an adhesive backing like sticker paper and works with all types of Cricut pens and markers, as well as any other type of pen or marker if writing by hand instead of using the machine. Smart Label Paper has a matte finish and gives your organizing project a classic and timeless look.

Smart Label Paper Is Best For:
- Clip on label holders for baskets
- Notebooks, planners, journals, and cardboard organizers
- Glass jars and pantry storage containers
- Freezer meals and lunch containers
- Gift tags

Classic Kraft Paper
The classic look of kraft paper labels will never go out of style, and Cricut offers it in both Joy and Joy Xtra sizes. Don’t have a Joy machine? No problem. You can use Cricut Joy Smart Label Writable Paper on a StandardGrip Mat with any Cricut machine. Just leave the backing on and use the measurements on the cut preview page of Design Space to rearrange your labels so they fit.


Dissolvable Paper
Cricut’s new Smart Label Dissolvable Paper is the coolest thing! It can be cut by both Joy machines as well as Maker 3 and Explore 3 and works with fine point pens. Use it for temporary labels like expiration dates on pantry containers or food details for freezer meals. When you’re ready to remove it, just hold the container under warm running water until it disappears. Or if the container is dishwasher safe, you can put it in with the label on and it will come out clean.
Read More: Easy Expiration Date Labels With Cricut Dissolvable Paper
5. Cricut Iron-On Vinyl
Iron-On Vinyl, also known as HTV, allows you to adhere labels onto fabric, wood, and leather. The heat bonds the label to the surface which prevents it from falling off or peeling. To apply iron-on vinyl, you will need either a Cricut EasyPress Heat Press or a clothing iron, as well as an EasyPress Mat or thick towel to protect your table.

Iron-On Vinyl Labels are Best For:
- Fabric storage bins
- Inside kids’ backpacks and coats
- Small storage pouches
- Wooden crates or leather baskets

What size and color options are available?
Cricut offers both Everyday Iron-On Vinyl (which requires a cutting mat but works with all machines) and Smart Iron-On Vinyl (which does not require a cutting mat but only works with Maker 3, Explore 3, and Joy machines). They come in a huge range of colors and sizes, including specialty materials like holographic, glitter, metallic, and heat activated options.

How Do I Know What Heat Settings To Use?
Cricut has a handy Heat Guide that lets you plug in the Iron-On material you are using as well as the surface you’re applying it to. Then, it automatically calculates the temperature your heat press should be set to, how long to apply heat, and whether you should do a cold or warm peel when the timer runs out. (Visit the Cricut Heat Guide here and bookmark it for future reference.)

Recap & Quick Reference Guide
Cricut has a wide range of material options for making labels to organize your home and life. All their materials go through rigorous testing to make sure they hold up to daily use, and your machine is calibrated to use each and every one of them.
To recap, the top five Cricut materials for making organizing labels are:
1. Premium or Smart Vinyl
2. Print Then Cut Vinyl & Sticker Paper
3. Smart Label Writable Vinyl
4. Smart Label Paper
5. Iron-On Vinyl
I know this is a lot of info at once, so I made you a quick reference guide below that you can pin on Pinterest, screenshot to your phone, or print out to store with your Cricut supplies. And I would love to know in the comments below which Cricut material is your favorite for making labels, or if there’s a material I mentioned that you haven’t tried yet.
For more Cricut tutorials, tips, and font ideas, visit the Cricut archives here.


